Application defects are where good labels go bad. The print was perfect on the roll - but on the container there are wrinkles across the face, bubbles under the film, or edges “flagging” away at the seam. Every one of these has a specific root cause, and none of them fix themselves.
Defect 1: Diagonal Wrinkles on Cylindrical Containers
Root cause: the label went on crooked - even 1-2° of skew forces the film to spiral, and stiff films cannot absorb it.
Fix: square the applicator peel plate to the container axis; check roller parallelism; slow the wipe-down speed. On manual lines, use a jig. Persistent skew on tapered bottles is a shape problem - see our label sizing guide.
Defect 2: Bubbles Under the Label
Root causes: trapped air from too-fast application on rigid films; outgassing from freshly moulded PET/HDPE containers (moulding gases escape for 24-48 hours and inflate blisters under impermeable films).
Fix: increase wipe-down pressure with a soft roller or brush; slow application slightly; for outgassing, rest containers 24-48 hours after moulding before labelling, or specify a micro-perforated / more permeable face.
Defect 3: Edge Lift and Flagging at the Overlap
Root causes: label stiffer than the curve wants (film memory), adhesive too weak for the surface, contamination (dust, mould-release agents, condensation), or square corners catching.
Fix: round all corners 1.5-3 mm; move to a thinner, more conformable film; upgrade adhesive tack for low-energy plastics; clean or corona-treat containers; on tight curves reduce label height. Cold-environment lift has its own chapter - our cold storage guide.
Defect 4: Wrinkles on Squeezable Tubes and Pouches
Root cause: a face material that cannot flex with the pack - paper or PET on a pack that customers squeeze hundreds of times.
Fix: switch to PE or squeeze-grade BOPP with a flexible adhesive. This is a materials decision, not an operator error - comparison in paper vs film labels.
Defect 5: “Orange Peel” and Tunnelling After a Day
Root cause: adhesive still flowing (wet-out) while the film relaxes; or plasticisers migrating from soft PVC containers attacking the adhesive.
Fix: allow 24-hour dwell before stacking or shrink-bundling; for soft PVC packs specify migration-resistant adhesives.
Defect 6: Random Placement and Skew at Speed
Root cause: worn rollers, low web tension, sensor mis-triggering on clear labels, or static.
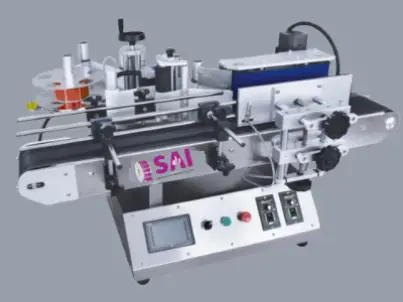
Fix: maintenance first (rollers, brakes, sensors); for clear labels ensure the applicator has a suitable label sensor (capacitive/ultrasonic); add static elimination bars in dry seasons. If you apply by hand today, a semi-automatic applicator pays back fast - ask us about the label applicator options we supply.
Diagnostic Cheat-Sheet
| Symptom | First Suspect |
|---|---|
| Diagonal wrinkles | Application skew |
| Bubbles day one | Trapped air / wipe-down |
| Bubbles day two on new bottles | Container outgassing |
| Edges lift on curves | Film stiffness / adhesive tack |
| Wrinkles after squeezing | Wrong face material |
| Fails only in winter | Cold application / static |
Fighting a recurring defect? Send Sai Impression a photo of the failure plus your container details - we diagnose material, adhesive and application issues and supply corrected constructions. Get a defect diagnosis →
FAQ
Why do bubbles appear under labels a day after application?
Freshly moulded plastic containers outgas for up to 48 hours; impermeable film labels trap the gas as blisters. Rest containers after moulding or use a more permeable face material.
How do I stop labels lifting at the edges on curved bottles?
Round the corners, use a thinner conformable film, increase adhesive tack, and make sure the surface is clean and dry. If the curve is very tight, shorten the label or move to a sleeve.
What causes labels to apply crooked on an automatic applicator?
Peel-plate misalignment, worn or non-parallel rollers, incorrect web tension, or the product guide letting containers rotate at the moment of application. A five-minute mechanical audit finds most of it.
Do clear labels need a special applicator sensor?
Yes - standard optical gap sensors cannot see clear labels on a clear liner. Capacitive or ultrasonic sensors detect them reliably; without one you get random placement.